It creeps me out that advertising on websites coincidentally matches up with what I just searched for in a different window....yes, I read 1984, way BEFORE 1984 and I don't like it. I do enjoy seeing the Mauviel Copper Jam pot photos that I searched for all over the place, but I'm waiting for the price to be $100....(let's see if that happens now, shall we :))
Clothes dryers are at my top 10 list of stuff ever invented! 2 days of crispy-line-dried undergarments after the dryer died made me So grateful for Downy-fresh-warm-out-of-the-dyer-wrinkle-free-clothing!!
Our boy Otto the cat, is now on a corn-free, wheat-free, fish-free diet to control allergies or has IBS. I think it's his psyche that is making him sick. He wants me to make him biscuits like the dog's. Really. He also loves vanilla Kaopectate of which he receives 2 mg per day, per the vet. Really.
For the 1024th time, I've had s friend inquire about RAW (unroasted) cacao beans used in our chocolate bar production. FACT: The world has been roasting cacao beans since at least the 1400's because it makes them TASTE better!! Are you drinking "raw" coffee too? FACT: Cacao beans are dried on the ground in mainly 3rd world countries without appropriate sanitation, so they are rife with Salmonella. Salmonella can be active for at least 7 years until heating kills it....why would you purposely eat this or feed it to your kids? I'm all about nutrition, fermentation and low processed foods, but I like to avoid monkey s*** and spiders creeping on my edibles. But that's just my opinion.
I purchased an oyster mushroom growing kit last month. I have had two dreams now about the spores infiltrating my kitchen and mushrooms growing out of the walls. I think a re-gifting might be in order. Just in case.
It's funny how the media, occupy wall street and the government are
all bitching about "big business" and yet don't apply it to
themselves.....I always want to comment something on the order of "who
employs folks that actually receive 6 weeks paid vacation, 401k plans,
shared health insurance costs, sick time, etc." Big business, that's
who, I surely can't as a "small business"!
30 May 2012
29 May 2012
Welsh Rarebit for Summer Days
This weekend brought some hot and steamy weather Michigan. It was the perfect time to power wash the house (we are down to THREE weeks before the graduation party), make a giant bowl of Gazpacho, start a new novel and attend a Memorial Day parade.
Pierre was the happiest to go to the farm and play with his friends.
The food highlight of the weekend was the Welsh Rarebit! Basically an open faced grilled cheese, English style!
WELSH RAREBIT
1 Pound Cheddar Cheese, chopped (I used 1/2 Cantal and 1/2 Mature English Cheddar)
1/2 cup Sour Cream
1 teaspoon Coleman's Dry Mustard
Salt & Pepper to taste
2 Egg Yolks
8 Slices good Artisan Bread (I used a Cibatta)
Worcestershire Sauce
Under the broiler, toast bread until lightly browned. Remove from oven and set aside.
In a large mixing bowl, combine cheese, sour cream, mustard, salt, pepper and egg yolks. Mix until combined.
Place an even layer of the cheese mixture over the toasted bread and return to the broiler until melted and a deep golden brown. Sprinkle with a few drops of Worcestershire Sauce and enjoy! The drops of sauce really MAKE this combo, please don't omit it!
We really loved this dish and I see it becoming a year-round affair!
25 May 2012
Pup Cinnamon Buns
I've been baking for Pierre and all the dogs that visit The Boulevard Market this week, and this recipe is super cute and Pierre loves them! It's a baked Cinnamon Bun for dogs.
Pierre likes a softer treat, so these were super fun and easy and stayed a little soft after baking. This yields about 24 small-ish treats. While the photo shows the entire batch of dough rolled out into one rectangle, half way through, I cut the rectangle in half length-wise or the buns would have been huge. Great for a big dog, but WAY too much for my terrier! My rolls ended up measuring abut 2 inches across. These were super easy and fun to make! You will want to refrigerate them for up to 3 weeks, or toss them in the freezer for up to 3 months.
PUP CINNAMON BUNS
1/2 cup cornmeal
2 cups whole wheat flour
2 teaspoons ground cinnamon
2/3 cup chicken stock
1/3 cup plain yogurt
FILLING:
1 tablespoon brown sugar
1 teaspoon ground cinnamon
1 egg, separated
Stir filling ingredients to combine. Beat the reserved egg white and set aside.
Preheat oven to 350 degrees.
Mix all ingredients in a large bowl until combined. Knead until a soft, shiny dough forms,picking up all bits of flour, about 3 minutes. Divide dough in half.
Roll dough out 1/3 inch thick, on a parchment paper into a square about 6X6. Spread with filling and roll up into a log. Cut log into 1/2-3/4 inch thick slices and lay them flat on a parchment lined baking sheet. Repeat with other half of dough. Brush rolls with beaten egg white and bake for 30 minutes.
You could add a drizzle of frosting, yogurt or leave shiny and plain!
24 May 2012
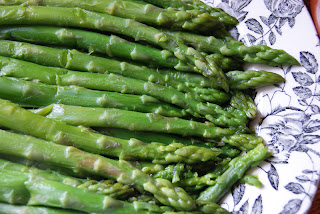
Asparagus & Truffle Oil Spread
Last year, from April through November, I hosted a series of home preserving classes at our shop, The Boulevard Market. Freezing, canning, drying, pickling, lacto-fermenting and even liqueurs and candied peel! The classes were based on in season produce.
It's been a great way to share knowledge, experience and recipes for the entire group!! I thought I'd share the favorite from last year (I shared with this year's group too :)) as we are nearly at the end of asparagus season.
I created the Asparagus Spread to be stored in the freezer and have a versatility to it in everyday cooking. This recipe makes a great appetizer with slices of baguette, a base for asparagus soup (add 3 cups chicken/vegetable stock) an easy savory tart on it's own, or spread onto a pastry crust and top with eggs for a quick and delicious quiche. It's also fantastic stirred into freshly prepared linguine pasta!
The ingredients are a tad more expensive, but it's truly worth the effort and expense for such an elegant, easy, tasty variety of dishes.
Asparagus Spread with Truffle Oil
1 pound asparagus, trimmed and cut into 1 inch pieces
1 stick butter
1 8 ounce carton mascarpone
Salt & pepper to taste
2 Tablespoons Truffle Oil
Saute asparagus in large sauté pan over medium heat about
6 minutes with butter until barely soft, and bright green.
Remove from heat and add mascarpone cheese, salt, pepper
and truffle oil. Stir until combined and
place in freezer containers. Let cool to
room temperature then place in freezer up to one year.
The Boulevard Market sells this for $12.98/ bottle. Not cheap, but worth it! |
20 May 2012
Making a Kir Royale
Kir Royale
- · Crème de Cassis
- · Champagne or other dry Sparkling Wine
A lovely bottle of Crème de Cassis was the highlight of my
week! Blue skies, summer-like weather, a
shorter project list and a recently bathed dog added to my contentment.
Last evening was the perfect time to indulge in a Kir
Royale. A cocktail originally made with
just a dry white wine from Burgundy, like Chablis, I’ve instead added a
sparkling Cremant de Limoux! I think the
wine’s bubbles add glamour and elegance as well as a bit more refreshment than
still wine. Crème de Cassis is a liqueur
made of black currants. Its ruby red
color and sweet/tart nature make it lovely drizzled over berries, a fresh
sponge cake or part of a cocktail.
Take 2 champagne flutes or wine glasses, add about a
tablespoon of Crème de Cassis and fill the flute full of sparkling wine, or the
wine glass half full of sparkling wine.
Enjoy!
13 May 2012
Warning...post contains a bug photo!
My little dog, Pierre, usually likes little things. He rolls in dead worms, lifts his little leg on small branches that have fallen and even has normal size dog treats cut in half. He stands about 1 foot 3 inches and weighs just under 12 pounds.
Pierre adores big bugs.
In Michigan we have "June Bugs" this time of year. It's a fat beetle about an inch long, shiny light brown with hooked legs that stick to things. They dive bomb lights at night and then later in the summer, you'll find their papery shells attached to tree bark.
Feel free to check out this link if you're feeling really scientific or into entomology; http://en.wikipedia.org/wiki/Phyllophaga_%28genus%29
Pierre is just fascinated with these June bugs. He finds them and drags them into the house to play with. So nice. They hook on his lips as he dances around. When nearly dead from being "dog handled", he rolls on them repeatedly until they are completely incapacitated. Then he runs out to find another.
I'm never sure if I should reprimand him or just enjoy the show as the bugs are only here for a short time.
I always thought I'd have a little dog that loved plaid sweaters and fluffy doggie beds, instead my dog likes black bandanas, bbq chips, my daughter Julia's dirty socks and sleeping in anyone's bed! He's probably been watching LA Ink and Jersey Shore while I'm at work....
It could be worse however, at least he hates spiders as much as I do!
Gelato...it's really this easy!
"WHY???" was the word roaring through my head! Why have I never made gelato? Because I thought it would be a total pain in the a**. Cooking, freezing, sticky, icy texture at home.....the list was long!
I took the plunge this week as I had an abundance of eggs and during one of the cleaning sprees, found the kids old-ish ice cream maker.
It's not a fancy ice cream maker, in fact I think I bought it on clearance more than a few years ago. Hamilton Beach brand with a bowl that you freeze for 24 hours before churning. Compact, easy to assemble and clean, a big enough hole in the top for additions and it churned out my gelato in less than 35 minutes. I could see how timing might be an issue, yet most gelato base recipes suggest you make the base 24 hours in advance too. I looked into other fancy ice cream makers and they were a larger capacity and had all sorts of features, but I really wasn't up for spending $100+, dealing with any type of ice/salt, or having another large appliance to store in my crowded kitchen and many still had a bowl to freeze. Once you got into quasi commercial, watch out...pricing was in the thousands!
I started with the chocolate base recipe first (of course!) and also made a plain base which taste similar to a custard. I found the whole process to be simple and about 15 minutes of hands-on time. I'm really surprised that I enjoyed making this so much! I am really excited to try my hand at sorbetto next and maybe add some extra goodies to the gelatos!
In a medium size mixing bowl, combine sugar and egg yolks and whip with a wire whisk until mixture turns a pale yellow.
In a large saucepan over medium heat, add milk and cream. Attach a candy thermometer (or any heat safe thermometer you use) and bring to 170 degrees, then remove from heat and whisk in cocoa powder and chopped chocolate until completely melted.
Add about 1/2 cup of hot milk to egg/sugar mixture and stir until combined. Repeat this step, then pour egg mixture into remaining milk in saucepan and stir until combined.
Return pan to medium heat, attach thermometer and bring to 185 degrees, stirring frequently until thick but not boiling, then remove from heat.
Pour mixture through a fine mesh sieve into a clean storage bowl. Allow to cool slightly and then refrigerate at least 4 hours or overnight.
Place base mixture into ice cream machine and churn until desired consistency. Machine times will vary. Mine took about 35 minutes at most.
Eat it straight out of the machine like we did, or put into a freezer container and freeze until almost solid. Gelato will have a softer texture than traditional ice cream (and less fat!).
I took the plunge this week as I had an abundance of eggs and during one of the cleaning sprees, found the kids old-ish ice cream maker.
It's not a fancy ice cream maker, in fact I think I bought it on clearance more than a few years ago. Hamilton Beach brand with a bowl that you freeze for 24 hours before churning. Compact, easy to assemble and clean, a big enough hole in the top for additions and it churned out my gelato in less than 35 minutes. I could see how timing might be an issue, yet most gelato base recipes suggest you make the base 24 hours in advance too. I looked into other fancy ice cream makers and they were a larger capacity and had all sorts of features, but I really wasn't up for spending $100+, dealing with any type of ice/salt, or having another large appliance to store in my crowded kitchen and many still had a bowl to freeze. Once you got into quasi commercial, watch out...pricing was in the thousands!
I started with the chocolate base recipe first (of course!) and also made a plain base which taste similar to a custard. I found the whole process to be simple and about 15 minutes of hands-on time. I'm really surprised that I enjoyed making this so much! I am really excited to try my hand at sorbetto next and maybe add some extra goodies to the gelatos!
CHOCOLATE GELATO
2 cups whole milk
1 cup heavy cream
4 eggs
1/4 pound chocolate- 60%-finely chopped ( I used Callebaut 67%)
1/2 cup cocoa powder (I used Valrhona natural cocoa powder)
4 large egg yolks
3/4 cups sugar
A note on chocolate/cocoa powder;
I used different cocoa powder and a darker chocolate than the recipe
called for however, with amazing results! You can easily change to
regular dutch cocoa powder and a lower percentage chocolate if you want a
more mellow chocolate flavor/sweeter finished gelato.In a medium size mixing bowl, combine sugar and egg yolks and whip with a wire whisk until mixture turns a pale yellow.
In a large saucepan over medium heat, add milk and cream. Attach a candy thermometer (or any heat safe thermometer you use) and bring to 170 degrees, then remove from heat and whisk in cocoa powder and chopped chocolate until completely melted.
Add about 1/2 cup of hot milk to egg/sugar mixture and stir until combined. Repeat this step, then pour egg mixture into remaining milk in saucepan and stir until combined.
Return pan to medium heat, attach thermometer and bring to 185 degrees, stirring frequently until thick but not boiling, then remove from heat.
Pour mixture through a fine mesh sieve into a clean storage bowl. Allow to cool slightly and then refrigerate at least 4 hours or overnight.
Place base mixture into ice cream machine and churn until desired consistency. Machine times will vary. Mine took about 35 minutes at most.
Eat it straight out of the machine like we did, or put into a freezer container and freeze until almost solid. Gelato will have a softer texture than traditional ice cream (and less fat!).
12 May 2012
Refinished table & chairs are nearly complete!
I posted last week about refinishing my antique table and chairs. The table is almost completed, but I still have to work on the leaves. It's been surprisingly sunny here in Michigan and the glare is been a stinker for my camera!! I probably need to put a nice runner or some sort of "decor" on it as well, but for this week, I'm enjoying the beauty of the new finish!! Hope this inspires you to tackle a refinishing project!! Th results are fantastic!
10 May 2012
Sorrel Soup
For years I have seen many references to sorrel in cookbooks, specifically European cookbooks, but rarely in anything from America. Nor have I ever seen sorrel for sale in Michigan. It frustrated me to no end....
Here is a great description of sorrel from a trusted source... http://www.herbcompanion.com/gardening/herb-to-know-sorrel-rumex-scutatus-r-acetosa.aspx
On Saturdays, John takes his cheeses to local farmers markets and usually does a bit of shopping as well. Much to my surprise, last Saturday he brought home sorrel and tiny fresh leeks! Whoo-Hooo!!
(Saline Farmers Market, 8am-12pm, Saturdays, downtown Saline, Michigan)
I drug out a favorite cookbook from my collection "In Season" by Sarah Raven. Sarah Raven in an English gardener/cook and this cookbook in particular is heavy on seasonal vegetable recipe but also contains and amazing amount of herb and game recipes. Who doesn't want to try "Deep Fried Parsley"???
I have never been disappointed in anything I've made from this cookbook and it has beautiful photography and ribbon bookmarks!! (Handy to the extreme!)
I followed the recipe closely with just a few minor alterations to suit my tastes, but it was simple and quick with a beautiful, bright flavor! I was so happy with the results and so was the family! I also loved the fact that this wasn't a huge recipe and the leeks didn't take over the flavor of the sorrel!
SORREL SOUP
by Sarah Raven with minor alterations by me
1 Tablespoon Butter
1 Tablespoon Olive Oil
2 Shallots, peeled and finely chopped
2 Leeks, small, finely chop the white parts only
3 Potatoes, cubed and peeled if desired, I didn't. I used small red ones, but Yukon gold would be great too!
3 cups Vegetable or Chicken Stock (I used chicken)
1/4 pound sorrel leaves, ribs and stems removed, coarsely chopped
1/3 cup Heavy cream
Salt & Pepper to taste
In a soup pot over medium-low heat, melt butter and olive oil and saute shallots and leeks without allowing them to brown about 10 minutes until soft. Add potatoes and stock. Simmer covered 23 minutes, add the sorrel and simmer an additional 2 minutes.
Remove from heat and place in a blender, puree until smooth, add heavy cream and check consistency. Add additional stock if the soup seems too thick.
Garnish with fresh chives, a sprinkle of fresh chervil or a few chunks of fresh chevre! I think the goat cheese would be SO fantastic as a garnish, it would echo the mild lemon flavor of the sorrel and still keep that fresh flavor!
Hope you enjoy as much as we did!!
09 May 2012
Refinishing antique chairs this week!
I thought I'd share my latest project....amongst others of course! Furniture refinishing! I done a fair amount of refinishing over the years, but these are a real stinker! The old varnish is just black with age and it's such a thick coat of nasty! It was like removing gum!!
These chairs were given to me by my mother-in-law, and she also gave me an antique threshing table with 6 leaves. She wanted a new dining set. They have been in my basement for at least 15 years, used for extra seating. She refinished the table years ago and put a coat of polyurethane on the top, so I decided to start on the chairs and the table needs it's top done as well.
I wanted to remove the old varnish, but hopefully keep the stain intact. I armed myself with 2 cans of stripper (strypeeze brand), 3 packages of #2 steel wool, a pair of chemical resistant gloves (NOT the disposable, tried it and they are not sturdy enough) 2 natural bristle paint brushes, plenty of newspaper and a lot of energy.
Since the chairs are so detailed, a scraper was useless to me, so I applied the stripper with a paint brush on half the chair, allowed to sit for 20 minutes and scrubbed off the goo with multiple pieces of steel wool that I unwound first.
These chairs took about 2 1/2 applications of stripper, as it was tough to hit every nook and cranny the first time around. If you're leaving the stain intact, be cautious to scrub in the same direction as the wood grain, or the stain will follow the scrubbing motion. I only used water on one chair that was particularly stubborn.
Once the finish was removed, I sanded the wood with superfine sand paper and wiped it down with a "tack cloth" basically a treated fabric used to remove dust and bits.
I stained in a "Minwax Red Chestnut" oil stain which looks great with my cherry floor in the kitchen/dining room. I wiped the stain on using a cloth (you could do a foam brush too) which I prefer for more control and less dripping to a brush. I used about 2 coats, softly buffing off any additional stain when absorbed to the desired color. Be cautious when staining that you don't allow drips, as they can show up on your finished wood.
I am using "Minwax Polyurethane Clear Satin" to seal and protect. I chose the satin finish as I like a soft wood look, as if it's just been polished, without too much gloss. Minwax makes it in many styles. I went with the oil based type, as I feel it holds up to everyday wear better than latex, but that's your call.
Tomorrow I will be finishing the last coat of polyurethane and the table top! I'll post a photo of it all put together!!
08 May 2012
Lemon Amaretti Cheesecake
Mascarpone;
An Italian, fresh, triple crème cheese
of cows milk from the Lombardy region.
Amaretti; also from the Lombardy region of Italy and are
made mainly from apricot kernels, sugar and egg whites.
Choosing
ingredients from the same region usually makes for great recipes, why?
{ perche e cosi }
Translation; because it’s like that
I
am a big fan of Mascarpone cheese! Most
famous for its place in Tiramisu, mascarpone is so much more than just for
dessert! We use it in place of heavy
cream in soups for a rich and silky smoothness, or in place of cream cheese as
it doesn’t have that sticky feel cream cheese possesses. I throw a spoonful into my macaroni and
cheese instead of creating a béchamel and use it in vegetable gratins and
risotto.
I
discovered another Italian favorite of mine is Amaretti cookies. I am
charmed by their oh-so-european wrappers and appearance. I love the jolt of almond flavor and the dry,
crusty quality. Amaretti are also from
the Lombardy region of Italy and are made mainly from apricot kernels, sugar
and egg whites. They come packaged
occasionally as a “ball” of two separate cookies. I also purchase them in bags.
I
always keep a bag on hand for garnishing puddings or cooked fruits, a tiny
treat with a late day espresso, or even topping squash/pumpkin soups. They seem to keep forever when tightly sealed
and if perhaps they get stale…a dunk in coffee or crushed into a crust perks
them right back up!
My
favorite dessert using these Italian specialties is found under my Sicilian
Recipe Booklet! I thought I’d give you a
few photos to go along with it and create an outstanding cheesecake to share
with friends today!
CRUST;
6
ounces Amaretti Cookies, crushed into crumbs
4
Tablespoons Butter, melted
Combine
in a small dish and press into a 9 inch springform pan.
Bake
crust in a 350 degree, preheated oven for 12 minutes.
FILLING;
16
ounces cream cheese, room temperature
16
ounces Mascarpone cheese, room temperature
1
¼ cups sugar
2
teaspoons fresh lemon juice
Zest
of 1 lemon
1
teaspoon vanilla extract
4
large eggs
In
a large mixing bowl, beat cheeses and sugar until smooth. Add lemon juice, zest and vanilla, stir until
combined. With your mixer on low, add
eggs one at a time, waiting until each is incorporated before adding the next.
Pour
filling into baked crust and bake 65 minutes.
Remove from oven and allow to cool an hour. Refrigerate for at least 4 hours before
serving.
Subscribe to:
Posts (Atom)